
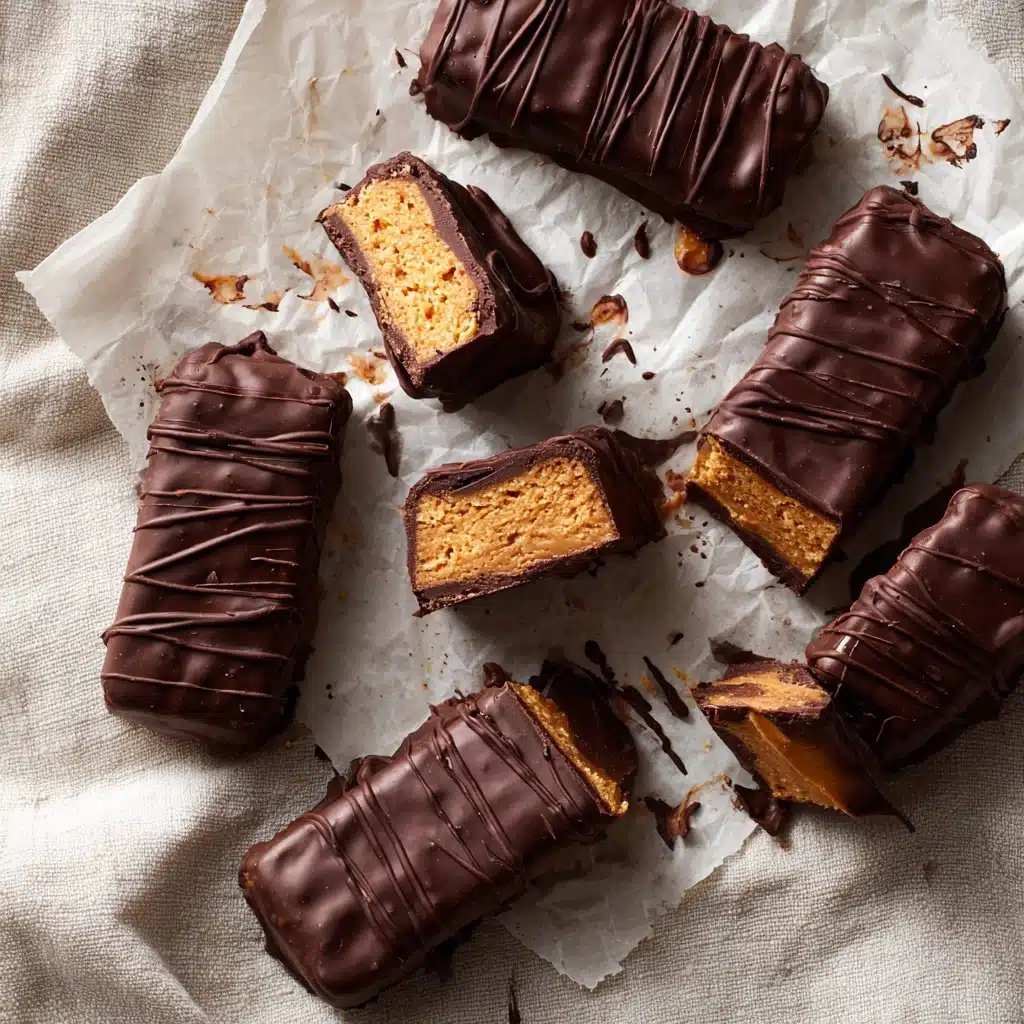
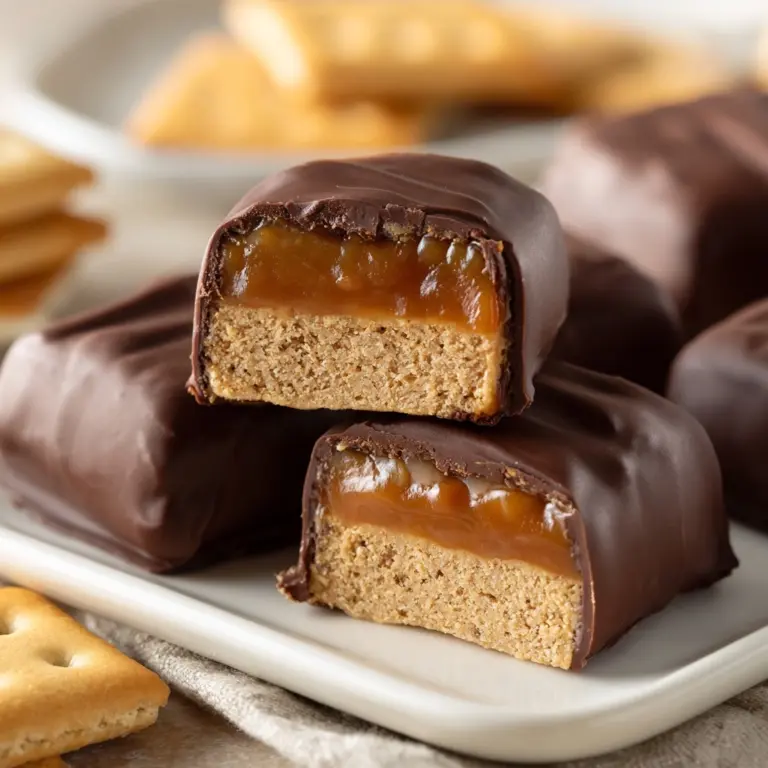
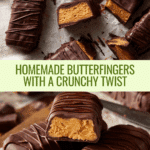
Healthy Homemade Butterfingers Recipe
If you’ve ever dreamed of having Healthy Homemade Butterfingers that manage to capture the crave-worthy crunch and addictive chocolate-peanut butter combo—minus all the mystery ingredients—get ready to fall in love. This version delivers the iconic flaky sweetness and snap of the original, but with nourishing twists that make each bite so much better (and guilt-free!). These bars are laughably easy, astonishingly delicious, and just begging to become your new go-to homemade treat for family, friends, and let’s be real… late-night snacking.
Ingredients You’ll Need
What makes these Healthy Homemade Butterfingers so magical is the handful of quality ingredients, each bringing something special to the table. Every component plays a key role in layering texture, flavor, and pure Butterfinger bliss—let’s break them down:
- Peanut Butter: The rich, nutty base that provides the classic Butterfinger flavor and keeps these bars satisfyingly chewy inside.
- Honey: Natural sweetness plus the all-important stickiness to create that signature flaky texture.
- Vanilla Extract: A splash for warmth and depth, rounding out the sweetness and making the flavors pop.
- Sea Salt: Just enough to bring out the flavors and balance the sweetness—you’ll taste a difference!
- Cornflake Cereal: The secret to that iconic crisp, shattering bite. Give them a little crush for the best texture.
- Chocolate Chips (dairy free, if needed): Because that smooth, glossy chocolate coating is non-negotiable for Healthy Homemade Butterfingers.
- Coconut Oil: Ensures the chocolate melts to silky perfection and hardens to a gorgeous shell.
How to Make Healthy Homemade Butterfingers
Step 1: Make the Peanut Butter Mixture
Start by grabbing a medium saucepan and placing it over medium-low heat. Pour in the peanut butter, honey, vanilla extract, and sea salt. Stir gently and patiently for 2-4 minutes, until the mixture is smooth, slightly runny, and lightly warmed through. This step not only helps everything combine beautifully but also ensures your bars set up with the right texture later.
Step 2: Fold in the Cornflakes
Scoop the warm peanut butter blend into a large mixing bowl with the cornflake cereal. Use a sturdy spoon to stir everything together, lightly crushing some of the cornflakes as you mix. Make sure each flake gets a glossy peanut butter hug—this is what gives Healthy Homemade Butterfingers their trademark crisp, layering in flavor and crunch in every nibble.
Step 3: Shape and Freeze
The mixture will be sticky, so don’t be afraid to get hands-on! Shape about 12-14 small logs using your hands (pro tip: dampen your palms with water or a bit of oil to avoid sticking). Arrange each log on a parchment-lined plate or baking sheet. Pop them in the freezer for a solid hour—this helps them set and makes them easier to dip in chocolate later.
Step 4: Melt the Chocolate
In a microwave-safe bowl or small saucepan, combine your chocolate chips and coconut oil. Microwave in 15-20 second bursts or gently heat on the stovetop, stirring between each interval, until silky-smooth. Be careful—chocolate burns quickly! You want a glossy pool to coat your Healthy Homemade Butterfingers beautifully.
Step 5: Dip and Set
Let the fun begin! Dunk each frozen log into the melted chocolate, letting the excess drip off before returning the bars to their parchment-lined sheet. Once they’re all glistening with chocolate, pop them back in the freezer for about 10 minutes, just until the coating hardens. After that, your Healthy Homemade Butterfingers are officially ready for snacking—store leftovers in the fridge or freezer for maximum crunch.
How to Serve Healthy Homemade Butterfingers

Garnishes
Turn these treats into showstoppers with a simple finish: a pinch of flaky sea salt sprinkled on top right after dipping, a drizzle of extra melted chocolate for artistry, or a dusting of crushed cornflakes for extra crunch. Each garnish adds a little pop—both for your eyes and your taste buds!
Side Dishes
Serve Healthy Homemade Butterfingers with a scoop of vanilla Greek yogurt, a splash of almond milk, or a platter of fresh berries for an irresistible dessert platter. They also pair perfectly alongside a hot cup of coffee or a tall glass of cold oat milk—the chocolate and peanut butter flavors are dreamy with both.
Creative Ways to Present
Stack them on a rustic wooden board for a cozy gathering, wrap them in parchment and twine for homemade foodie gifts, or slice each log into bite-sized pieces to fill mason jars at your next party. However you present them, these bars always win hearts and spark conversation.
Make Ahead and Storage
Storing Leftovers
Keep your Healthy Homemade Butterfingers in an airtight container in the refrigerator, where they’ll stay perfectly crisp and delicious for up to two weeks. Make sure they’re layered between pieces of parchment or wax paper to prevent sticking—trust me, you’ll want to grab just one without making a mess!
Freezing
For longer storage, these bars are freezer-friendly stars. Once the chocolate has set, transfer your Healthy Homemade Butterfingers to a sealed container, separating layers with parchment. They last beautifully in the freezer for up to three months. When you need a treat, just snag one and enjoy straight from the freezer for extra crunch, or let sit at room temp for a couple of minutes to soften.
Reheating
These bars don’t need reheating, but if you’d like a slightly melty experience, leave a Healthy Homemade Butterfinger out at room temperature for 10 minutes. Avoid microwaving, which can make the chocolate separate or soften the crunch. Room temp is perfect for bringing out that deliciously flaky texture!
FAQs
Can I use a different nut butter instead of peanut butter?
Absolutely! Almond butter or sunflower seed butter will work well and create a fun flavor twist, though the bars may be slightly less crunchy. Just make sure to use creamy, pourable nut butters for smooth mixing.
Are Healthy Homemade Butterfingers gluten-free?
Yes—just use a certified gluten-free cornflake cereal. Always check labels, as some brands add malt flavoring that contains gluten.
What’s the best way to crush the cornflakes?
You can crush the cornflakes gently with your hands as you stir them in, or place them in a zip-top bag and lightly smash with a rolling pin. Aim for a mix of shards and some whole pieces for an authentic texture.
Can I make these bars vegan?
Definitely! Swap the honey for maple syrup or brown rice syrup, and use dairy-free chocolate chips. The bars will be just as delicious and completely vegan.
Why do my bars seem sticky or not set up?
If your Healthy Homemade Butterfingers are sticky after freezing, try keeping them in the freezer a bit longer or storing in the fridge instead of at room temp. Make sure you use the right amount of cornflakes and that the chocolate coating is fully set before handling.
Final Thoughts
If you’ve always dreamed of that classic candy-bar crunch with a healthy, homemade upgrade, these Healthy Homemade Butterfingers were absolutely made for you! They’re fun to make, beyond satisfying, and guaranteed to make anyone who tries them swoon. Don’t wait—gather your ingredients, and treat yourself to homemade magic. I can’t wait to hear how yours turn out!
Print
Healthy Homemade Butterfingers Recipe
- Total Time: 1 hour 20 minutes
- Yield: 12–14 bars 1x
- Diet: Vegetarian
Description
Learn how to make a healthier version of the classic Butterfingers candy bars at home with this simple recipe. These homemade Butterfingers are made with wholesome ingredients and are perfect for satisfying your sweet tooth.
Ingredients
Peanut Butter Mixture:
- 1 cup peanut butter
- 1/3 cup honey
- 1/2 tsp vanilla extract
- 1/2 tsp sea salt
Cereal Mixture:
- 1 + 3/4 cup cornflake cereal
Chocolate Coating:
- 1 cup chocolate chips (dairy-free, if needed)
- 1 tsp coconut oil
Instructions
- Heat Peanut Butter Mixture: In a saucepan over medium-low heat, combine peanut butter, honey, vanilla, and salt. Heat for 2-4 minutes until smooth.
- Mix Ingredients: Add the peanut butter mixture to a large mixing bowl with the cereal. Mix everything well, ensuring the cereal is coated.
- Shape and Freeze: Form the mixture into logs and place them on a parchment-lined plate. Freeze for 1 hour.
- Prepare Chocolate Coating: Melt chocolate chips and coconut oil. Dip each log in the chocolate, then freeze until set.
- Enjoy: Store the homemade Butterfingers in the refrigerator or freezer until ready to eat.
- Prep Time: 15 minutes
- Cook Time: 5 minutes
- Category: Dessert
- Method: Mixing, Freezing
- Cuisine: American
Nutrition
- Serving Size: 1 bar
- Calories: 180
- Sugar: 10g
- Sodium: 110mg
- Fat: 12g
- Saturated Fat: 4g
- Unsaturated Fat: 6g
- Trans Fat: 0g
- Carbohydrates: 15g
- Fiber: 1g
- Protein: 4g
- Cholesterol: 0mg
Keywords: homemade Butterfingers, healthy candy bars, DIY Butterfingers