
Transfer the mixture to the prepared Recipe
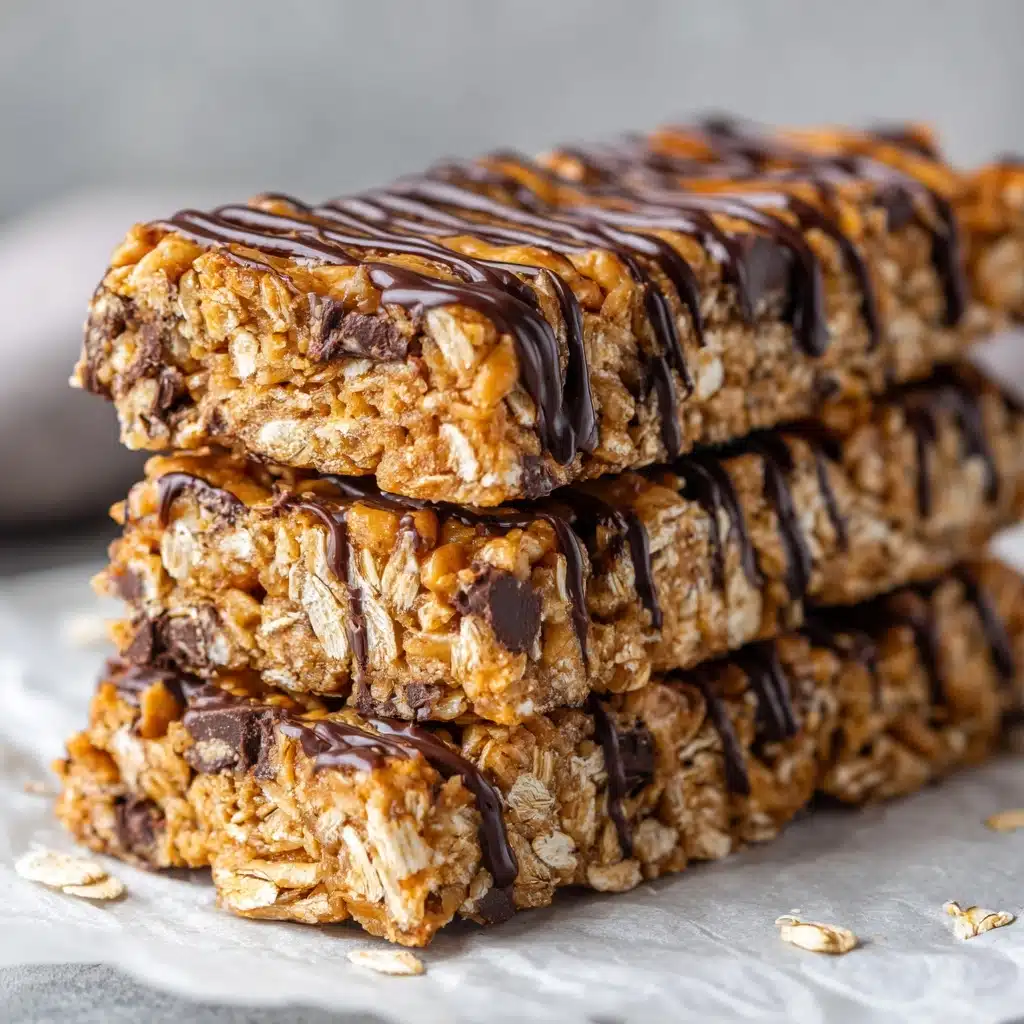
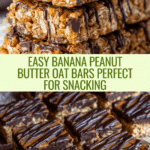
If you’re searching for a snack that packs nutrition, energy, and pure satisfaction in every bite, these Easy Banana Peanut Butter Oatmeal Bars are about to become your new favorite. Soft, chewy, and naturally sweetened, they blend pantry staples into wholesome bars you can feel good about grabbing any time of day. The most crucial step? Transfer the mixture to the prepared baking dish—this is where the magic happens, compacting all the goodness so every bar holds together beautifully, ready for slicing and sharing!
Ingredients You’ll Need
You’ll be amazed at how a handful of simple ingredients come together to create a snack that’s both nourishing and delicious. Each one adds its own essential flavor, texture, or nutritional benefit, making these bars so much more than the sum of their parts.
- Ripe Bananas: The natural sweetness, moistness, and subtle flavor really shine through in these bars—make sure your bananas are well-speckled for the best results.
- Creamy Peanut Butter: For that lovely, nutty richness and satisfying, chewy texture; natural peanut butter works beautifully here.
- Honey or Maple Syrup: Adds sweetness and helps the bars stick together—choose whichever you prefer, or even adjust to taste.
- Vanilla Extract: A dash of vanilla rounds out the flavors and adds warm, familiar notes.
- Old-Fashioned Rolled Oats: Oats give body, chew, and a hint of earthiness—be sure to use rolled oats (not instant).
- Ground Flaxseed (optional): Slip in a bit of flax for a subtle nutritional boost and extra fiber—totally optional but highly recommended for a health upgrade.
- Chopped Nuts: Walnuts, almonds, or pecans add a delightful crunch and heart-healthy fats.
- Mini Chocolate Chips or Dried Fruit (optional): Whether you want a pop of sweetness or a burst of chewy fruit, this is your moment to make these bars your own.
- A Pinch of Salt: Just the smallest amount to enhance all the flavors—don’t skip it!
How to Make Transfer the mixture to the prepared
Step 1: Prep and Gather Ingredients
Start by prepping all your ingredients before you begin—this makes for a smooth, stress-free experience! Mash the ripe bananas until creamy in a large mixing bowl. Measure out your peanut butter, honey or maple syrup, and vanilla. If you’ve chosen to toss in nuts or chocolate chips, get those ready too. Having everything lined up will help you breeze through the steps.
Step 2: Combine Wet Ingredients
Add the peanut butter, honey or maple syrup, and vanilla extract to your mashed bananas. Stir it all together until you’ve got a cohesive, smooth mixture. The goldenness of the honey, the aroma of the vanilla, and the creaminess of the peanut butter will blend into the bananas for a truly dreamy base.
Step 3: Add the Dry Ingredients
Time for the oats! Toss in the rolled oats, the ground flaxseed if you’re using it, and the pinch of salt. Mix until every bit of oat is slicked with that luscious banana-peanut butter mixture. This is also the moment to marvel at how easy and wholesome this recipe really is.
Step 4: Fold in Optional Add-Ins
If you’re adding chopped nuts, chocolate chips, or dried fruit, now’s the time. Give everything one last gentle but thorough stir, ensuring those tasty extras are evenly distributed for bites loaded with flavor and texture.
Step 5: Transfer the Mixture to the Prepared Pan and Press
Line an 8×8-inch baking dish with parchment paper, leaving enough overhang to make removing the bars a breeze once set. Transfer the mixture to the prepared pan, then use a spatula or your hands to press it down very firmly and evenly. Compacting is crucial—this step helps your bars hold their shape beautifully. Really give it some gentle muscle!
Step 6: Chill to Set
Pop your pan in the fridge and let those flavors meld for at least 2 hours (longer is fine!). Chilling allows the bars to firm up so they’re easy to slice and perfectly chewy once set. The wait is so worth it.
Step 7: Cut into Bars
Once set, lift the bars out using the parchment overhang. Set them on a cutting board and use a sharp knife to slice into bars or squares—wiping the blade between cuts yields those satisfyingly neat edges. You’ll love the satisfying “thunk” as the knife glides through!
How to Serve Transfer the mixture to the prepared

Garnishes
After you transfer the mixture to the prepared dish and slice your bars, why not go that extra mile? Sprinkle a little flaky sea salt on top, drizzle with an extra zigzag of peanut butter, or dust lightly with cinnamon. These finishing touches add visual appeal and an extra pop of flavor everyone will adore.
Side Dishes
These bars stand up as a snack on their own, but they also shine next to a bowl of Greek yogurt, a fresh fruit salad, or even alongside your favorite smoothie. Pack one with a cup of coffee in the morning or pair with tea for a charming afternoon pick-me-up.
Creative Ways to Present
For a fun twist, cut the bars into bite-sized cubes for a party platter or lunchbox snack. Try wrapping individual bars in parchment for an adorable, on-the-go treat. You could even sandwich a layer of jam between two thin bars for a playful dessert!
Make Ahead and Storage
Storing Leftovers
After you’ve cut your bars, line an airtight container with parchment and layer the bars inside, separating each layer with more parchment. Keep them in the fridge, and they’ll stay fresh, soft, and tender for up to a week! Perfect for meal-prep or snack emergencies.
Freezing
Want to stash some for a rainy day? Wrap each bar in plastic wrap (or parchment) and freeze them in a zip-top bag for up to three months. Defrost in the fridge or at room temperature whenever you need a snack you can feel good about.
Reheating
If you like your bars a little warm and gooey, simply zap one in the microwave for about 10–15 seconds. This brings back that just-made softness, and makes the chocolate chips especially melty and irresistible!
FAQs
Can I make these bars nut-free?
Absolutely! Swap the peanut butter for sunflower seed or soy nut butter and skip the nuts (or use pumpkin seeds instead). The result will be just as delicious, allergy-friendly, and still perfectly chewy.
What can I use in place of honey?
Maple syrup makes a great alternative, keeping the bars plant-based and just as sticky. Agave nectar or brown rice syrup would also work, although it may slightly alter the flavor.
Do the bananas have to be very ripe?
Yes—the riper the bananas, the sweeter and more flavorful your bars will be. Those spotty, soft bananas at the bottom of the fruit bowl are perfect for this recipe!
Can I double the recipe?
For sure! Simply double the ingredients, use a 9×13-inch pan, and don’t forget to transfer the mixture to the prepared dish before pressing. You might need to chill a little longer, but the process remains the same.
Are these bars suitable for kids?
Definitely! These bars are kid-approved, easy to pack, and contain no refined sugar. Just make sure to chop any nuts or dried fruit very finely for little eaters, and always store leftover bars safely.
Final Thoughts
If you adore easy, nourishing treats you can customize and share, you’ll fall in love the moment you transfer the mixture to the prepared pan and press down that last layer. These Banana Peanut Butter Oatmeal Bars are all about simplicity, flavor, and pure snacking joy—so grab those ripe bananas and enjoy every bite!
Print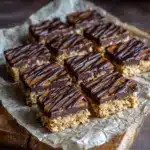
Transfer the mixture to the prepared Recipe
- Total Time: 2 hours 15 minutes
- Yield: 12 bars 1x
- Diet: Vegetarian
Description
Easy to make banana peanut butter oatmeal bars that are perfect for a quick breakfast or snack. These bars are packed with wholesome ingredients like ripe bananas, creamy peanut butter, and oats, making them a delicious and nutritious option.
Ingredients
Ripe Bananas:
- 2 ripe bananas, mashed (about 1 cup)
Creamy Peanut Butter:
- 1/2 cup creamy peanut butter (use natural peanut butter for a healthier option)
Honey or Maple Syrup:
- 1/4 cup honey or maple syrup (adjust to taste)
Vanilla Extract:
- 1 teaspoon vanilla extract
Old-Fashioned Rolled Oats:
- 2 cups old-fashioned rolled oats (use gluten-free oats if needed)
Ground Flaxseed:
- 1/4 cup ground flaxseed (optional, for added nutrition)
Chopped Nuts:
- 1/4 cup chopped nuts (such as almonds, walnuts, or pecans)
Mini Chocolate Chips or Dried Fruit:
- 1/4 cup mini chocolate chips or dried fruit (optional, for extra sweetness)
Salt:
- A pinch of salt
Instructions
- Prepare the Ingredients
Start by mashing the ripe bananas in a large mixing bowl until smooth. Measure out the peanut butter, honey (or maple syrup), and vanilla extract. If using nuts or chocolate chips, chop or measure them as needed.
- Combine Wet Ingredients
Add the peanut butter, honey (or maple syrup), and vanilla extract to the mashed bananas. Stir well until the mixture becomes smooth and evenly combined.
- Add Dry Ingredients
Next, incorporate the rolled oats, ground flaxseed (if using), and a pinch of salt into the wet mixture. Stir thoroughly to ensure the oats are fully coated and the ingredients are evenly distributed.
- Mix in Optional Add-Ins
If using chopped nuts, chocolate chips, or dried fruit, fold them into the mixture. Customize the recipe based on your preferences.
- Press the Mixture into a Pan
Line an 8×8-inch baking dish with parchment paper. Transfer the mixture and press it down firmly. Chill in the refrigerator to set.
- Chill to Set
Place the dish in the refrigerator for at least 2 hours until firm. This helps the bars hold their shape.
- Cut into Bars
Once set, lift the parchment paper, cut into bars, and enjoy!
- Serve and Store
Serve immediately or store in the fridge for up to a week. For longer storage, wrap bars individually and freeze for up to 3 months.
Notes
- For a variation, try adding dried cranberries or raisins for a fruity twist.
- Feel free to substitute almond butter or another nut butter for the peanut butter.
- You can also drizzle melted chocolate over the bars for a decadent touch.
- Prep Time: 15 minutes
- Category: Snack
- Method: Baking
- Cuisine: American
Nutrition
- Serving Size: 1 bar
- Calories: 180
- Sugar: 10g
- Sodium: 75mg
- Fat: 8g
- Saturated Fat: 1.5g
- Unsaturated Fat: 5g
- Trans Fat: 0g
- Carbohydrates: 25g
- Fiber: 3g
- Protein: 5g
- Cholesterol: 0mg
Keywords: Banana, Peanut Butter, Oatmeal, Bars, Snack, Healthy